Uncategorized

Easy Dame’s Weeknight Polenta

We love polenta in our house, its delicious and hearty and easy to make. Most of the time I like to make it from scratch but Trader Joe’s makes an awesome log of polenta that is hard to resist. While walking down the aisles last night manfriend requested some polenta for dinner and I had to agree it sounded fantastic.

IMG_5653

While day dreaming today at work, deciding what to throw on this polenta I decided to throw together a homemade vegan pesto and throw some veggies on it. We’re past the gluten free phase of our lives but we are working to eliminate dairy and so I’ve come back to my vegan roots. I’ve thrown together a good amount of pesto in my day, and it’s fairly easy but trying to make it without parmesan would be a bit trickier.

IMG_5658

 Most of the usual suspects were there-olive oil, basil, garlic, though I decided to use a base of walnuts instead of pine nuts, add a bit of lemon for some acid and nutritional yeast instead of parmesan. I have to say I’m really happy with the result, its super creamy and definitely the star of this dish.

I roasted the polenta in the oven, cooked the veggies on the stove and threw it all together with the sauce. Easy peasy weeknight polenta, who could resist?

Vegan Pesto Polenta with Zucchini and Tomato

Prep Time : 10 minutes | Cook Time : 20 minutes | Serves : 4

Ingredients

1 log of prepared polenta

1 cup cherry tomatoes

2 small zucchini

Olive Oil / Avocado Oil

Salt & Pepper

Instructions

1. Preheat oven to 400. Slice polenta into 12 even slices and place on baking sheet, coat with avocado oil and sprinkle with salt and peppers. Put polenta into oven and set timer for 10 minutes.

IMG_5654

2. While polenta is in the oven, slice zucchini into quarters and then small slices. Slice tomatoes in half.

IMG_5655      IMG_5656

3. Saute zucchini in olive oil on medium high heat for 5 minutes and add tomatoes. Turn heat to high and sautee for another 8-10 minutes until cooked thoroughly.

4. Check on polenta, after about 10 minutes, flip over and turn oven to low broil. Cook for another 10 minutes until edges are crispy.

5. Remove from oven and layer polenta with cooked veggies and top with vegan polenta (recipe below).

IMG_5669


Vegan Pesto Sauce

Ingredients

1/2 cup walnuts

1 bunch of basil

2 cloves of garlic

1 tablespoon nutritional yeast

1 lemon

1/8 cup Olive OIl

Salt to taste

Instructions

1. Place all ingredients in blender to combine. Start with amounts listed and adjust for consistency preference, you may need more olive oil but just keep adding a bit of the ingredients to get a consistency you like.

 IMG_5666

Give this a try some night when you want something healthy, delicious and easy! Enjoy!

Uncategorized

Roasted Tomato, Zucchini and Brussel Sprout Bowl

IMG_5524

A good friend of mine just recently had a baby, and they are doing the most ingenious thing I’ve ever heard of. To take care of their nutritional needs in the crazy wake of welcoming a new person into their lives they signed up for MealTrain. It allows your friends to bring you food on days you chose, great right? Who wants to deal with grocery shopping and slaving away in the kitchen when you just created some incredible human life and want to spend all your time with that precious little bundle of happiness. Not to mention you get to sample all kinds of food and cooking styles – bonus! (maybe that’s just me that would be excited about this)

As a way to support my friend, I signed up to bring her dinner tonight, which for me actually took a lot of planning. I have to confess, I usually don’t decide until the day of what I’m making for dinner which results in a lot of trips to the grocery store. So many trips in fact that my manfriend and mother are concerned with how well the cashiers at our local Trader Joe’s know me. Oh well 🙂

So yesterday I got my planning on and decided to make them chicken enchiladas. While I don’t eat meat, my wonderful future mother in law bought me a crock pot for the holidays and I’ve been putting it to use for things like cooking an entire chicken. It’s the prefect scenario for me- hands off! Anyway, enough about that dinner that has yet to happen (I’ll post that recipe later) since I did all that planning yesterday for what I’d take to my friend today, last night I was not in the mood to have to think about what I was going to make myself for dinner. And that’s where this bowl comes in, it’s easy, relatively quick and I made it with all things I already had in my kitchen.

IMG_5506

This bowl was warm and delicious offering some bitterness from arugula and a bit of crunchy from the brussel sprouts. The roasted tomatoes offered a bit of burst of flavor and color and were the perfect addition. I top it all with a lemon tahini dressing and the result was fantastic, I couldn’t stop eating it.

Roasted Tomato, Zucchini and Brussel Sprouts Bowl with Fresh Arugula and Lemon Tahini Dressing

Prep Time : 10 minutes | Cook Time : 30 minutes | Serves : 4

Ingredients

2 cups brussel sprouts

2 medium zucchini

1 package mini heirloom tomatoes

3 cups arugula

2 cups faro

Avocado Oil

Salt & Pepper


Instructions

1. Preheat oven to 400 degrees. Start by chopping ends off brussel sprouts and slicing in half. Place in bowl and toss with avocado oil and salt and pepper and place on baking sheet. Slice zucchini lengthwise and again down the middle and slice into even pieces. Toss with whole tomatoes in oil and salt and pepper.

IMG_5512       IMG_5516

2. Put both trays in the oven and roast for about 25 minutes, checking occasionally and stirring.

3. While veggies are in the oven, bring 4 cups of water to boil on the stove and add uncooked faro. Lower temperature and keep on a rolling boil until faro is cooked. Set aside.

IMG_5520

IMG_5519

IMG_5518

4. When veggies are cooked, remove from oven and assemble bowl. Layer farro in bottom of bowl and top with zucchini, tomato and brussel sprouts and top with arugula. Pour lemon tahini dressing (recipe below) on top and mix to enjoy!

IMG_5525    IMG_5523


Lemon Tahini Dressing

Prep Time : 5 mins | Total Time : 5 mins

Ingredients

1/2 cup tahini

1 tablespoon soy sauce

1 lemon

2 tablespoons olive oil

2 cloves garlic

Salt & Pepper


Instructions

1. Mix all that delicious stuff in your blender until creamy, you can play around with this, if you want it more watery add some plain almond milk or water, if you want it thicker, up the tahini. You can’t really even taste the soy sauce in here, it’s like its the mystery ingredient, I made this and felt like it was missing something. Threw some soy sauce in there and it was perfect.

IMG_5517

Hope you enjoy this as much as I did, so easy and so delicious. Happy Hump Day!

Uncategorized

I got it from my momma

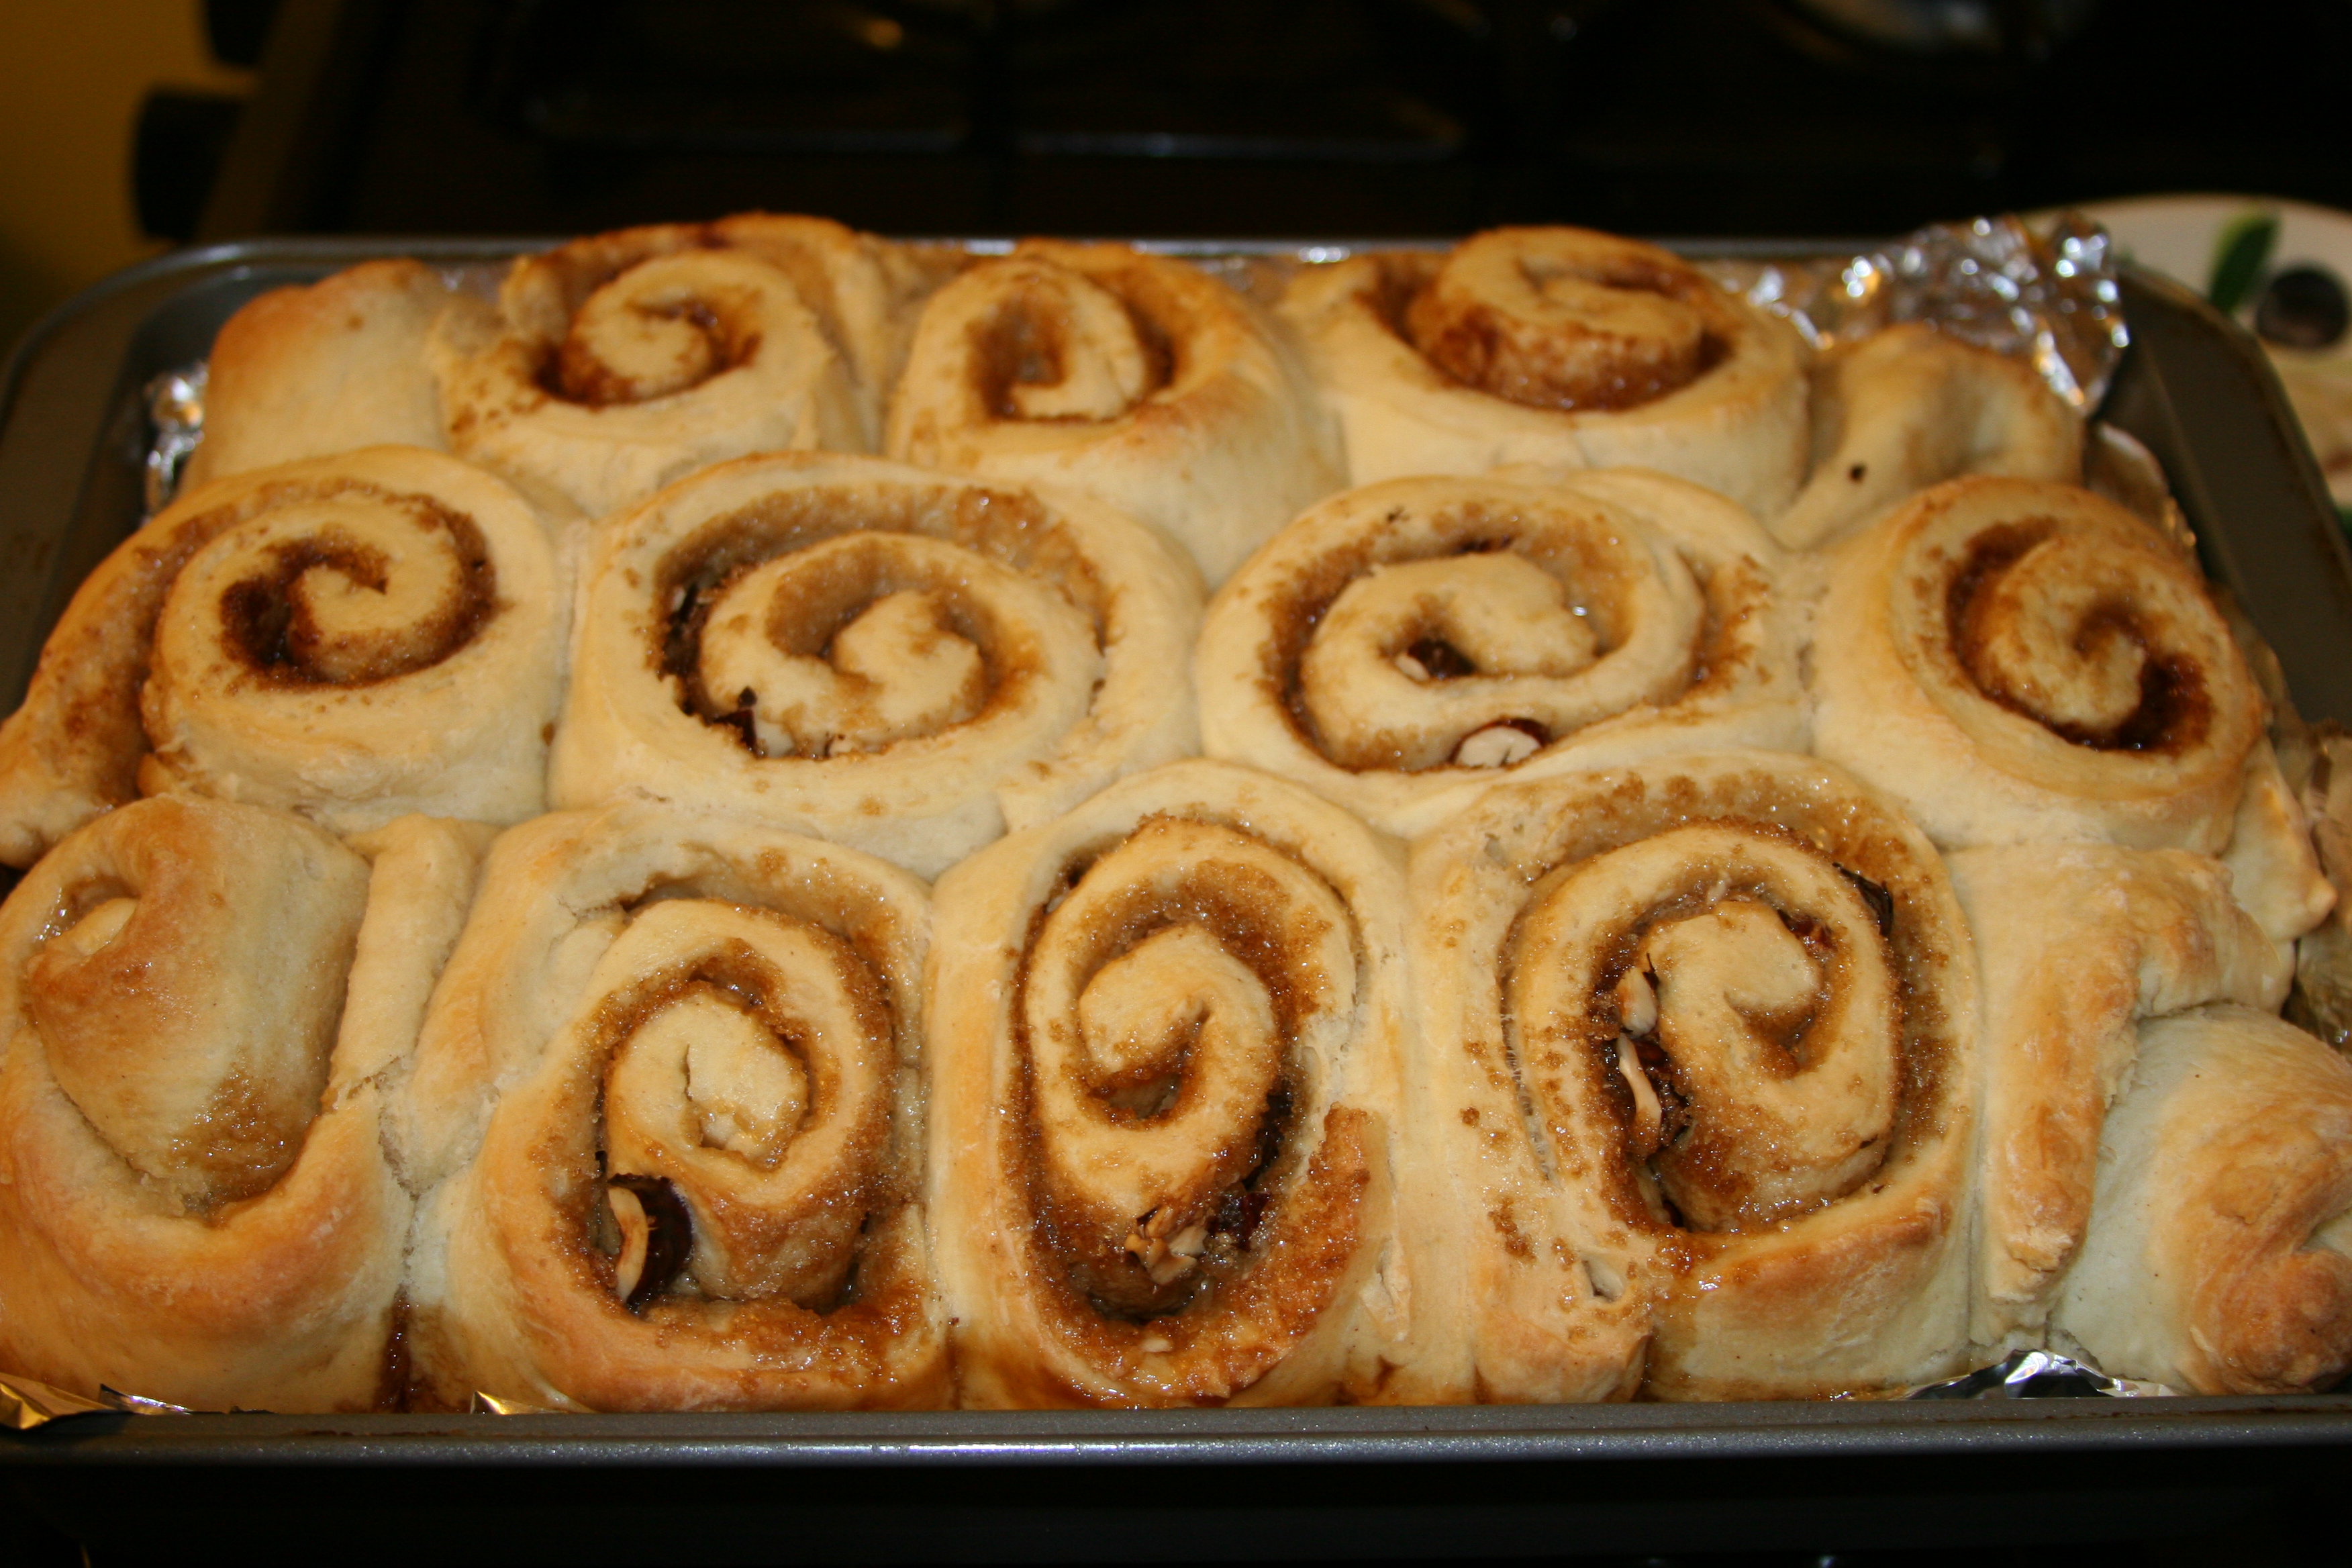
Well, technically I got it from my great grandma according to a conversation I had with my mom this weekend. That ‘it’ I’m talking about is the most delicious and easy cinnamon roll recipe that I’ve ever made – not that I’m biased or anything.

IMG_5495

Ooey, gooey, sweet, fluffy and satisfying.

Manfriend and I prefer to give experiences than actual gifts, and this past New Year we exchanged gifts and gave each other a weekend away. This past weekend we went on the first getaway together to Eastern WA. I decided to take Friday off so we could sleep in and start our trip relaxed versus trying to rush out of work and beat traffic out of town on a Friday afternoon. Since I am rarely home on week day mornings I wanted to take advantage of the extra morning time and start our trip with a special breakfast – as we’ve already established, I do not like to get up early for anything.

My mom has made these cinnamon rolls for every Christmas morning for as long as I can remember, and I’m sure my mom’s mom did and her mom before that. The best thing about these is that they can be prepped the evening before and then rolled out in the morning and go from fridge to oven to table in less than an hour. They only require 6 ingredients for the dough and the possibilities for fillings are endless.

IMG_5477

If you’ve never made cinnamon rolls from scratch, don’t be intimidated, these are super easy and worth the effort, you won’t want to buy store bought cinnamon rolls ever again. These are the perfect thing to bring to brunch or impress your in laws with, or just for a special weekend breakfast. Or if you’re super ambitious, even a week day breakfast. They also keep really well so you can be noshing on them all weekend.

My Momma’s Cinnamon Rolls

Prep Time : 15 mins | Rest time : 8 hours or overnight | Cook Time : 30-40 mins
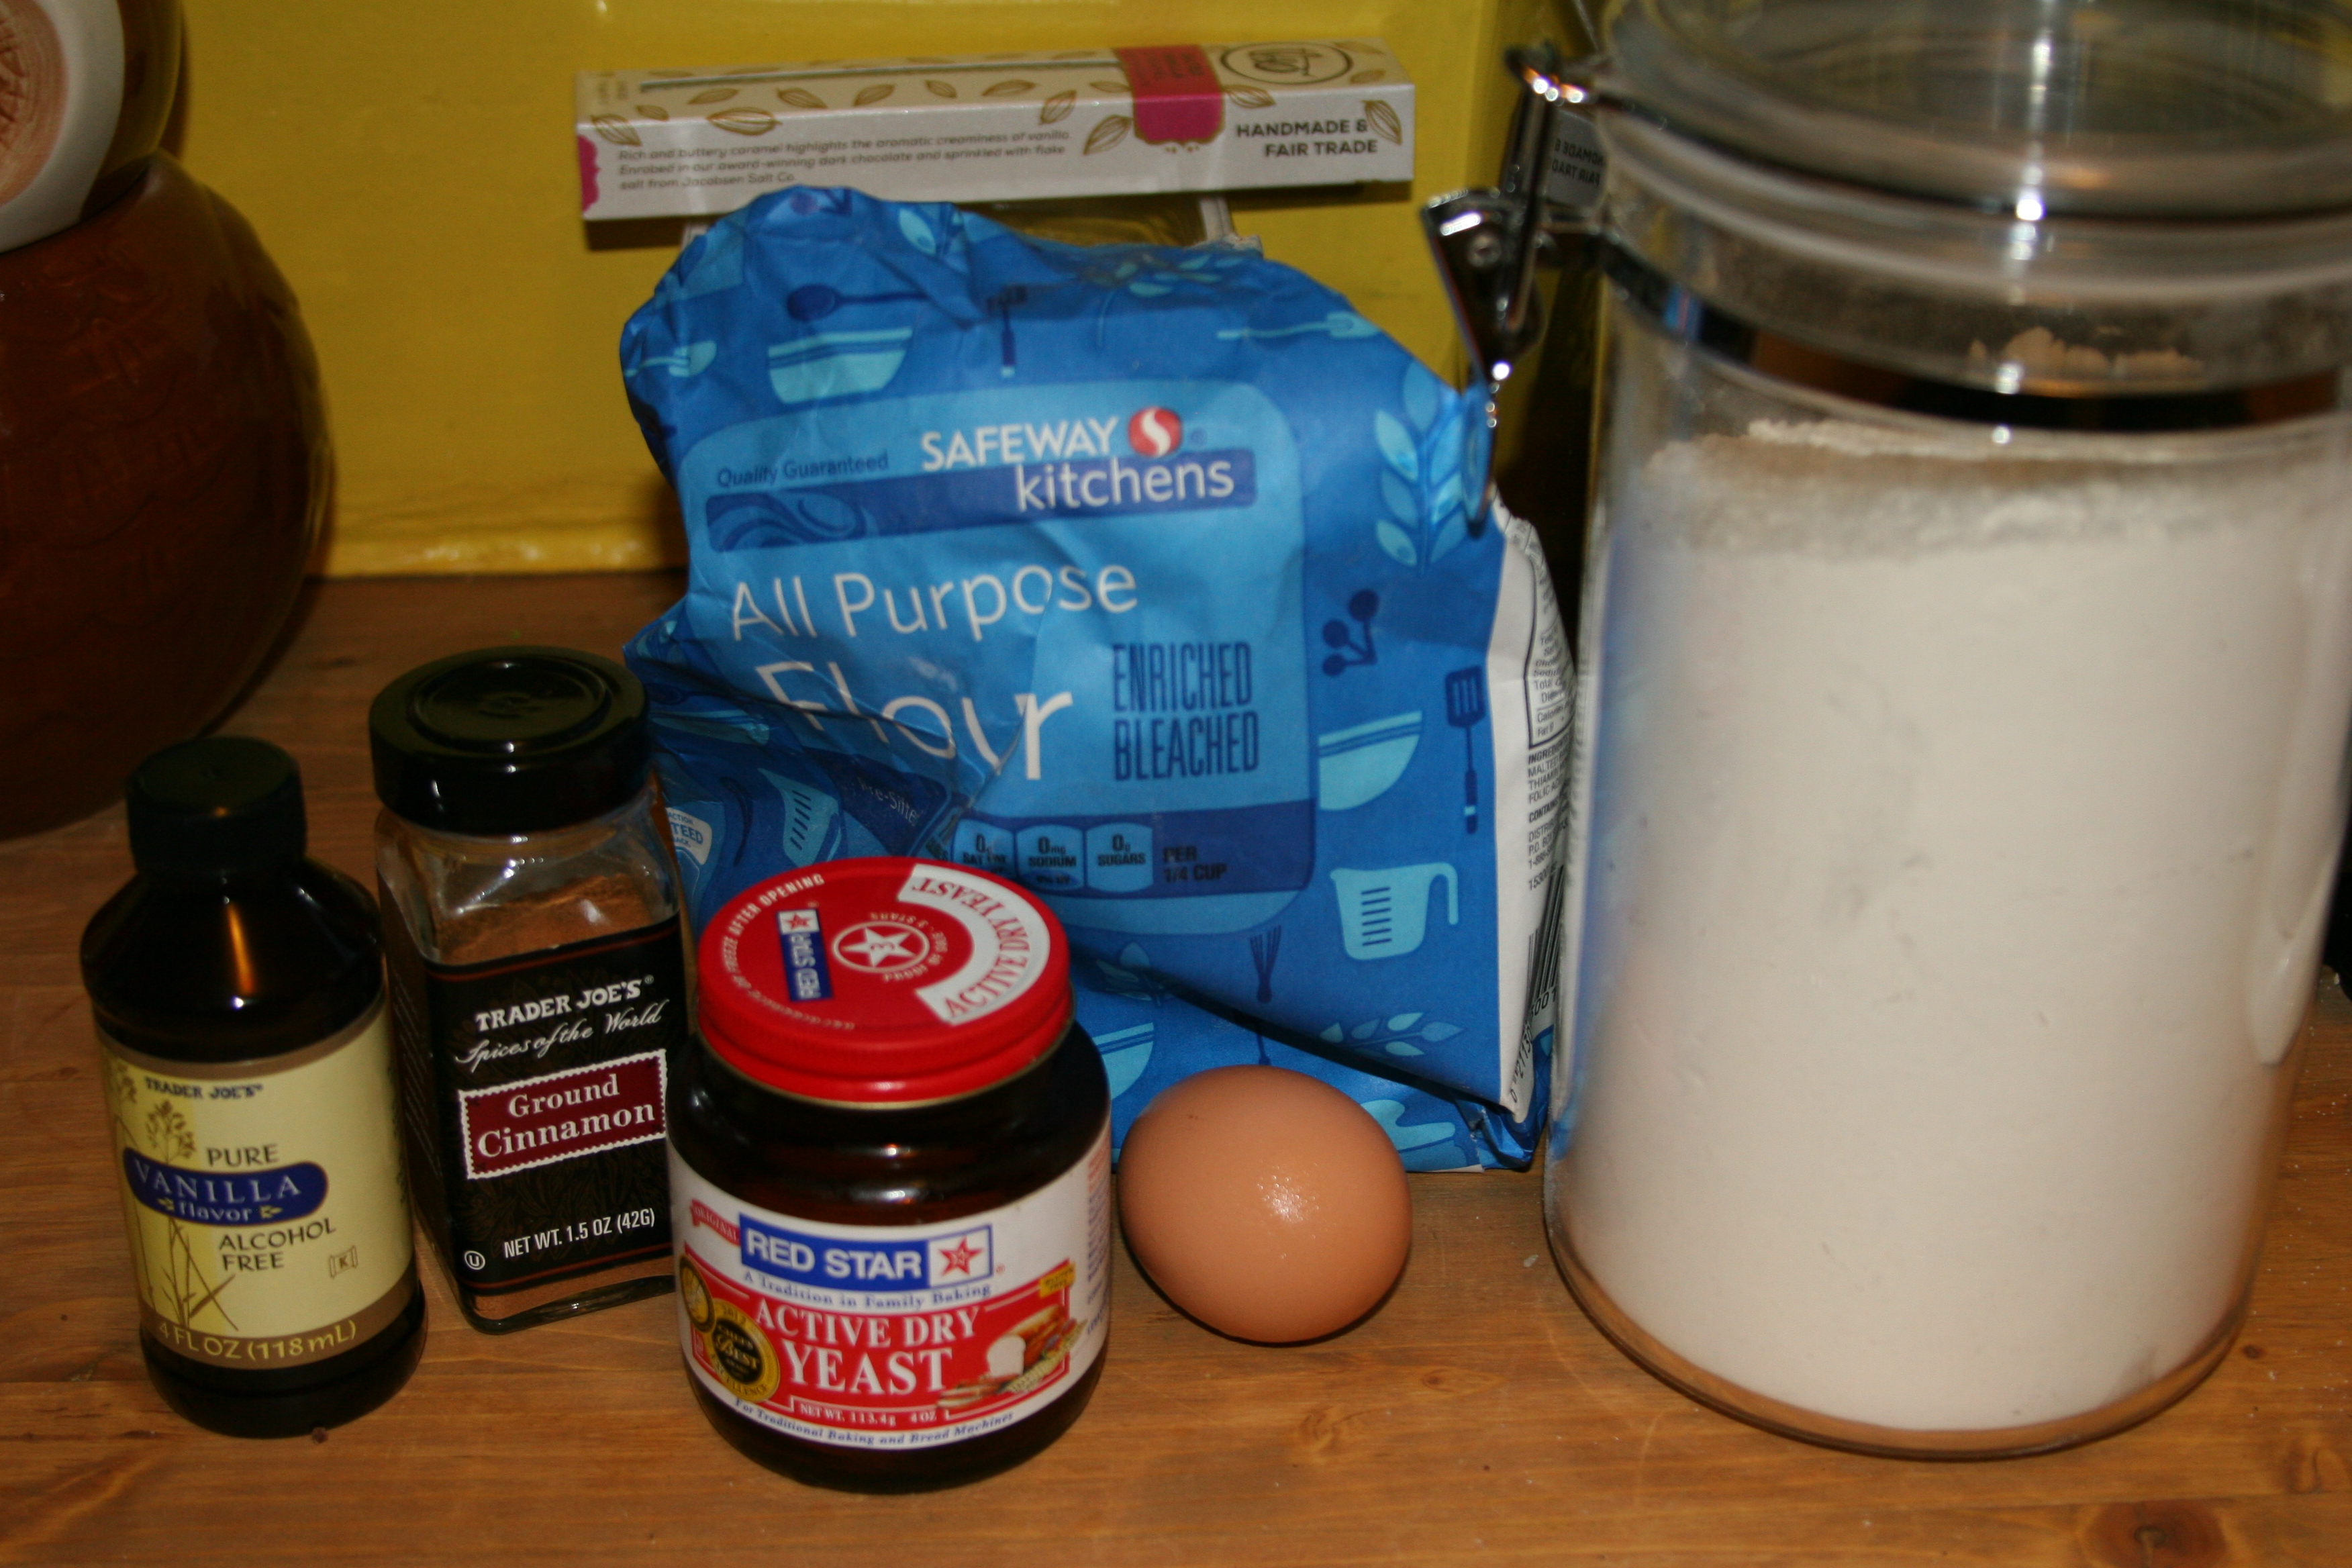
Ingredients :

Dough

2 cups of warm to hot water

1 package of yeast or 2 1/4 teaspoons

3/4 cup sugar

1/3 cup oil (I used avocado, canola or vegetable will do just fine)

1 egg

1 tsp vanilla

1 tsp cinnamon

Approx 6-7 cups flour

Filling

1/4 cup unsalted butter

1/2 cup brown sugar

cinnamon

Instructions:

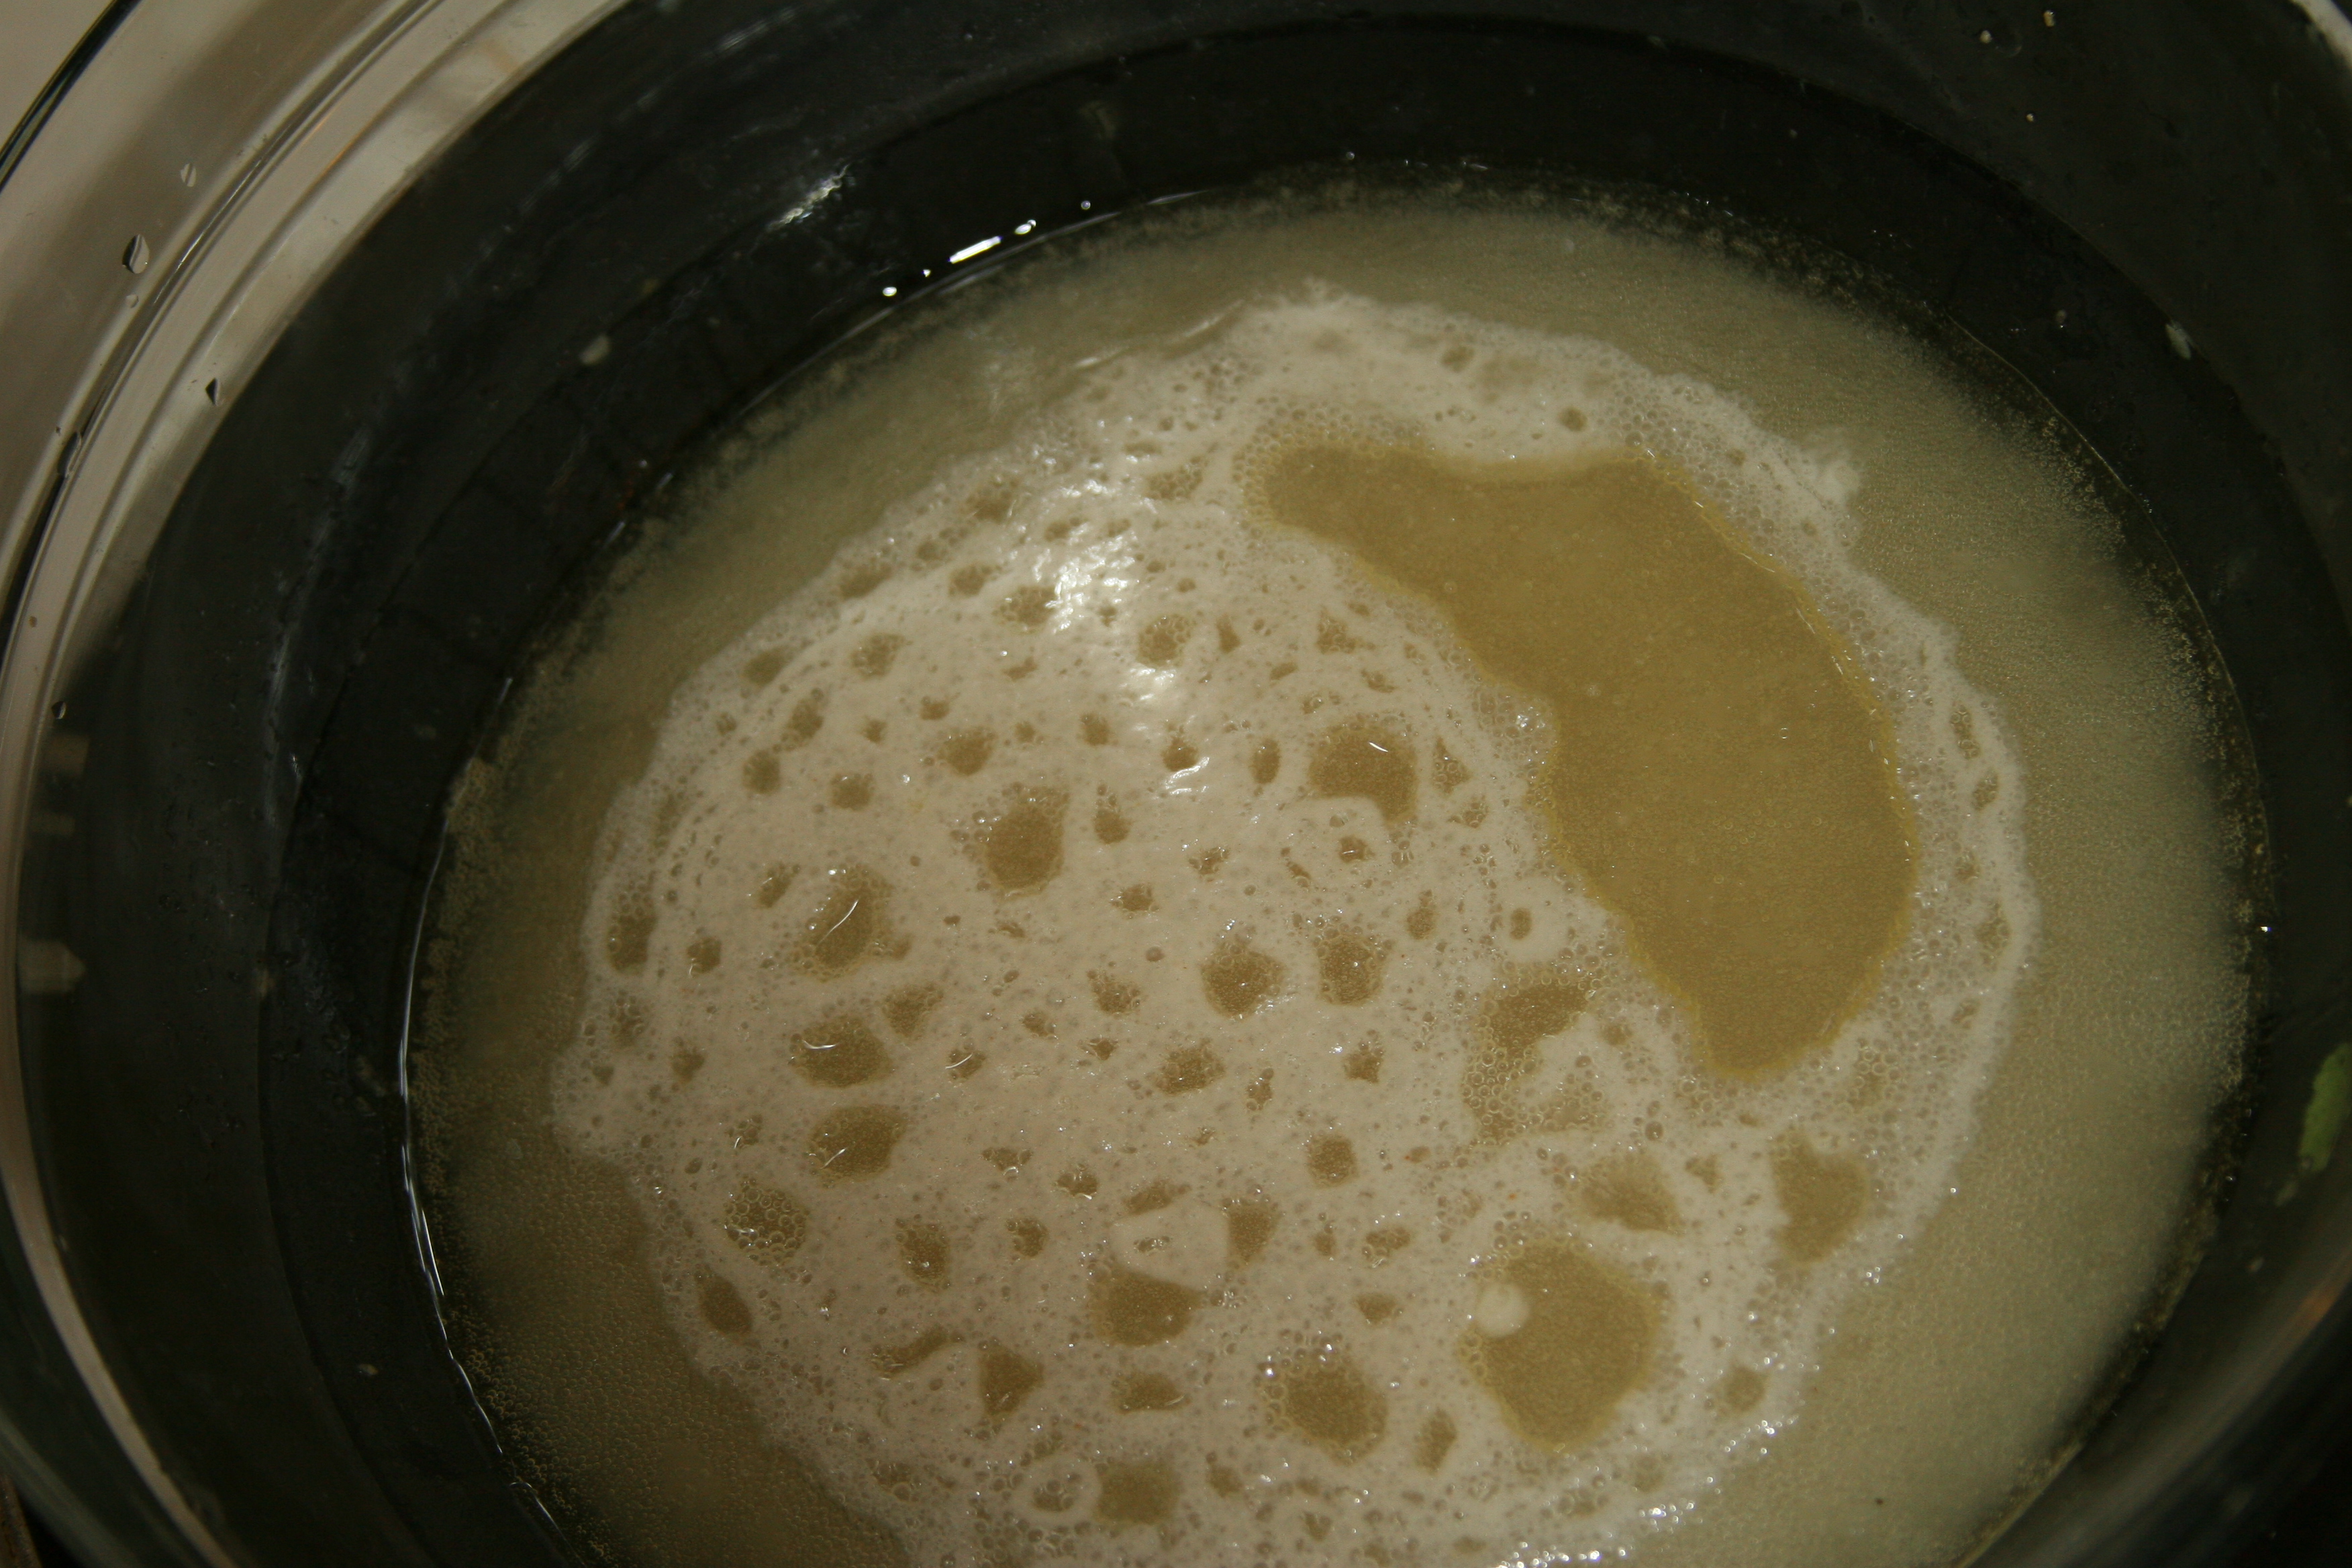
1. Add hot water to bowl and let sit to warm bowl, then pour out and add 2 cups of hot but not boiling water, mix in yeast, sugar and oil and let sit for about 10 minutes. The yeast will start feeding on the sugar, producing bubbles and look something like this.

IMG_5478

   2. Once the mixture is bubbled up, add one egg, cinnamon and vanilla and whisk to combine.

   3. Start adding flour about 1/2 cup at a time, I try to use the whisk as long as possible to incorporate smoothly but you will eventually have to use your hands until the dough comes together and is no longer sticky. Make sure to not add too much flour or it will be too dry.

IMG_5480

   4. Once the dough comes together, coat bowl in oil and place somewhere warm. I like to turn the oven on to about 350 and just set the bowl on the oven until the dough doubles in size or reaches the top of the bowl, about 45 minutes. If your kitchen is warm enough, setting this on the counter should suffice. Make sure to turn oven off once dough has risen.

IMG_5484

   5. Once dough has doubled in size, punch a hole in the middle to deflate dough, then cover and put into fridge overnight.

   6. In the morning, the dough will have risen again, take out of fridge and let come to room temperature, I like to do this about 30 minutes before I plan to roll out the dough. Preheat oven to 350 degrees.

  7. Roll out the dough until even and about the size of a cookie sheet, or however large your counter top will allow. Melt butter and spread on dough, sprinkle with brown sugar and cinnamon. At this time if you wanted to add raisins, nuts or even something crazy like nutella, go for it! I threw some chopped hazelnuts in these guys at the last minute and did not regret it.

IMG_5487

   8. Roll up the dough lengthwise until you have a long log. Slice into pieces and place into a 9X11 baking pan. I like to line the pan with foil as it makes it easier to remove the rolls from the pan and makes cleanup significantly easier since these babies will be sticky 🙂  You’ll want to space them out a bit since they will expand during baking.

         IMG_5490            IMG_5491IMG_5493

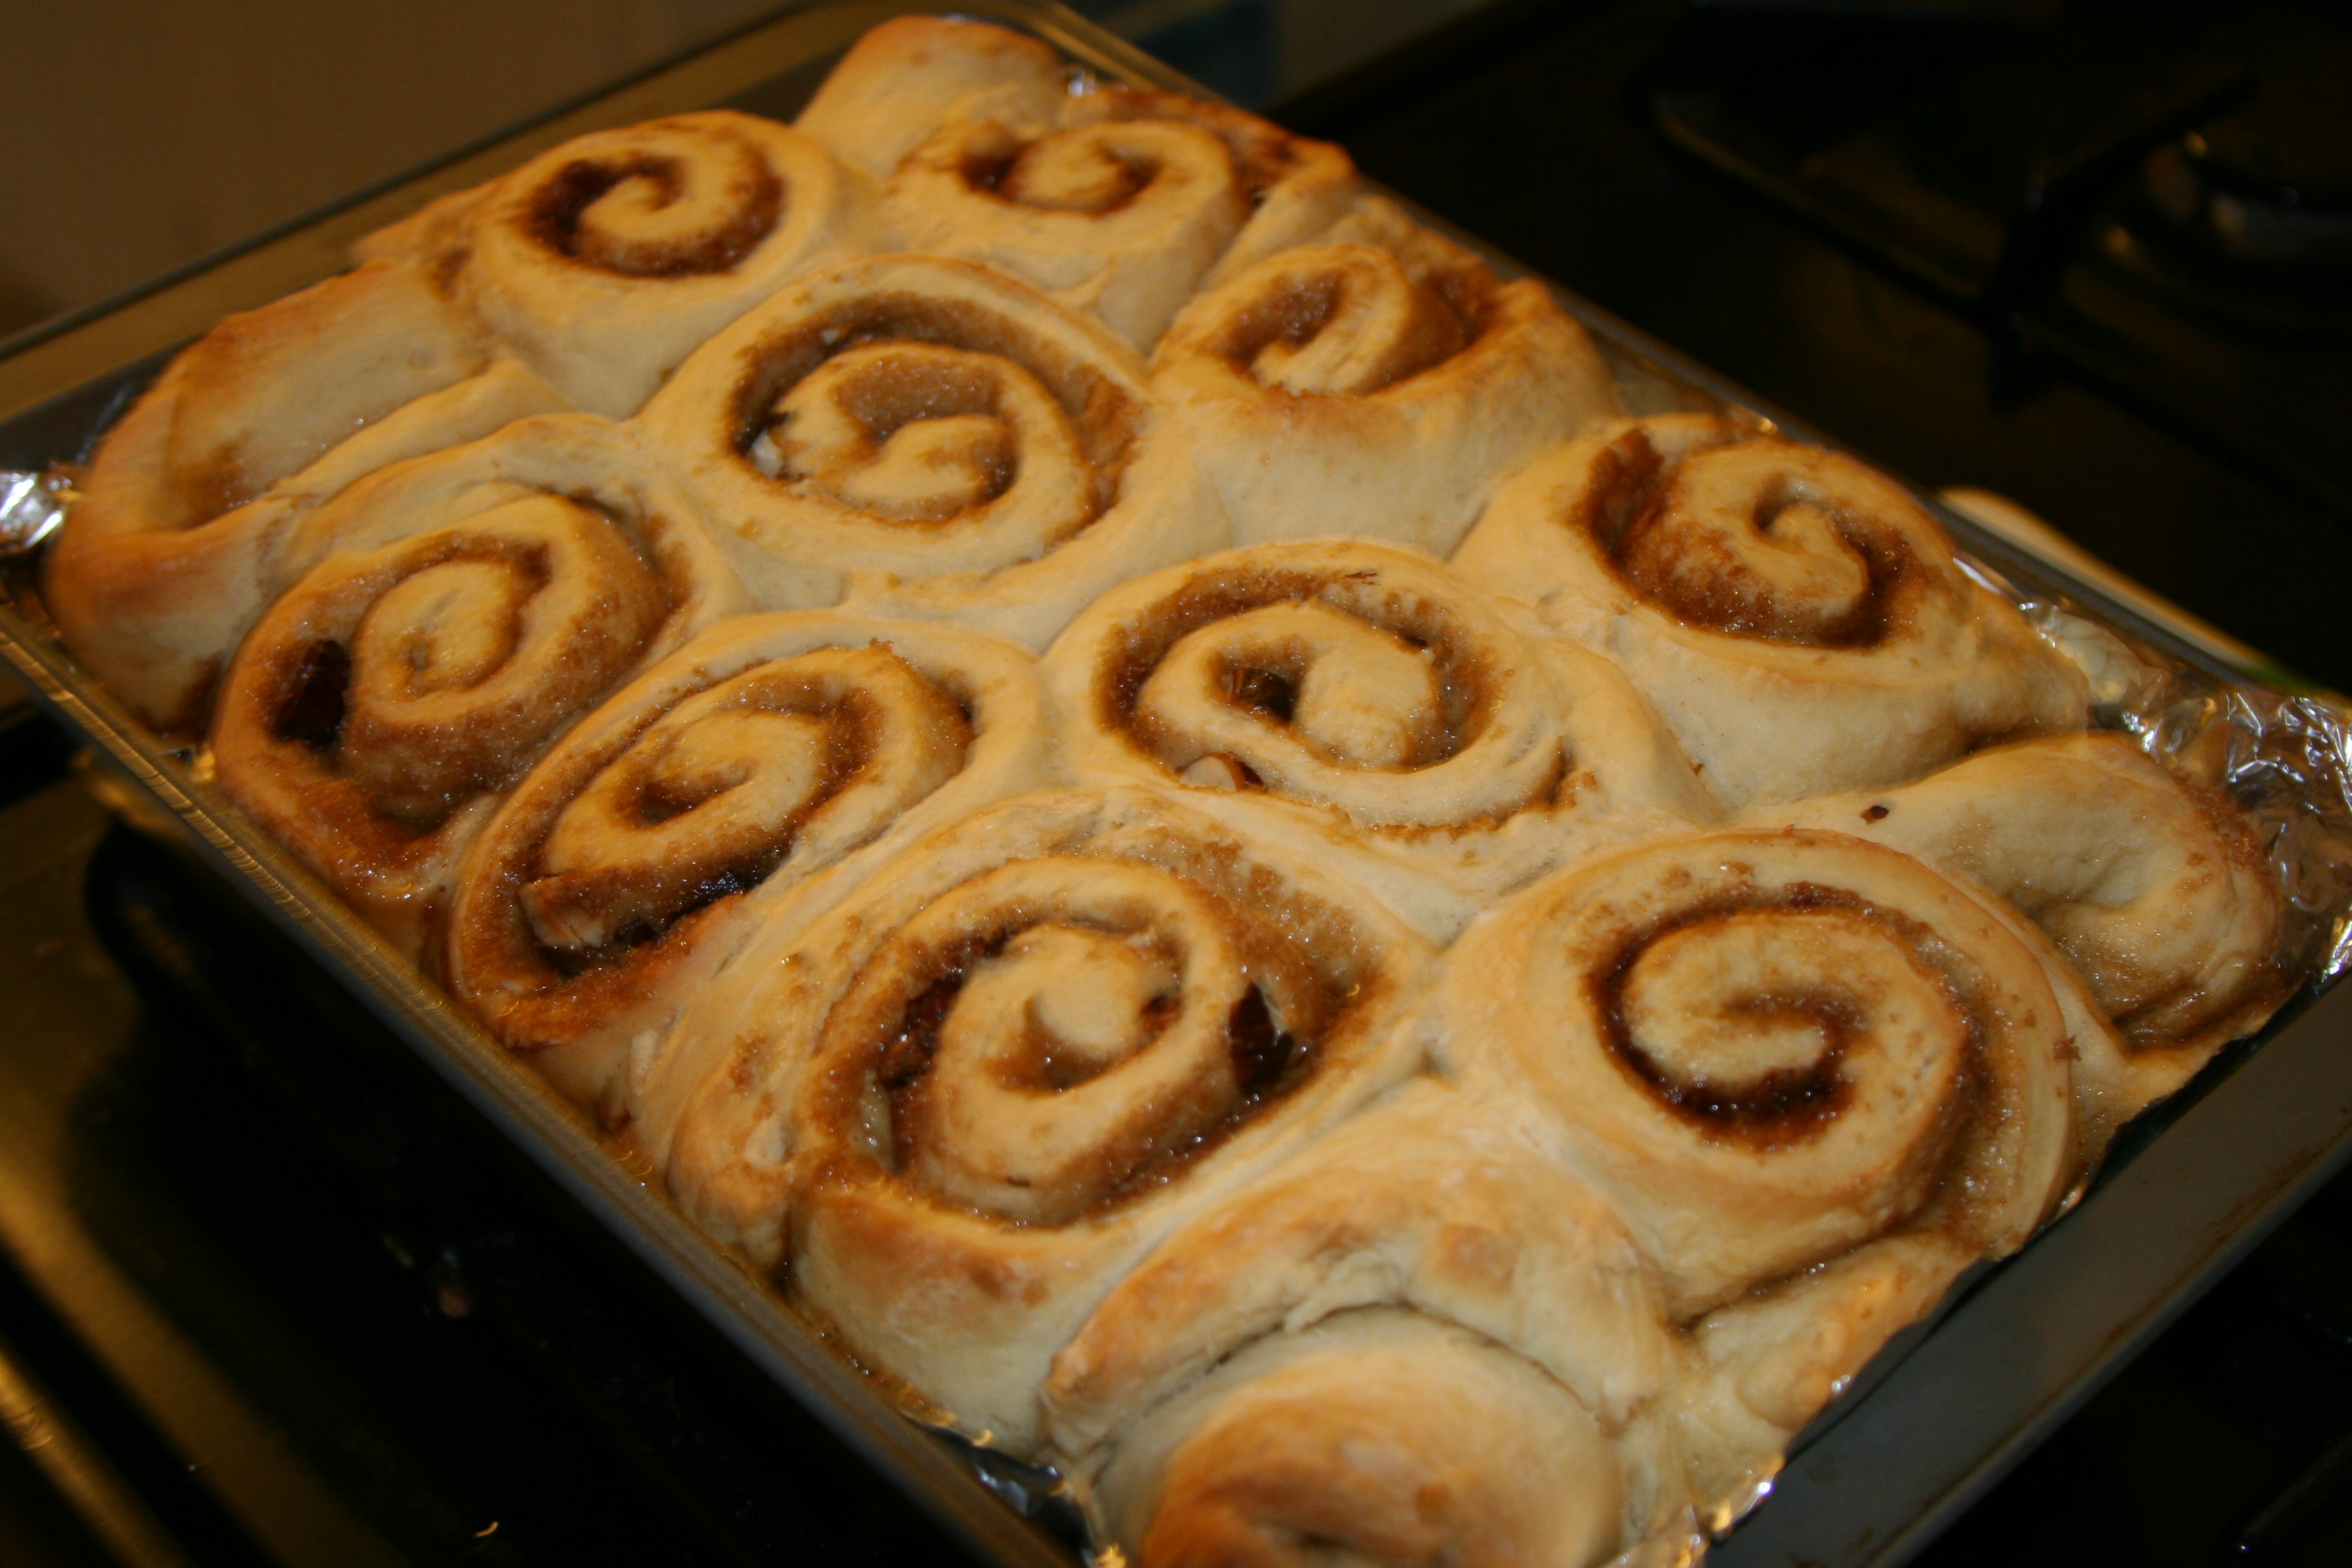
8. Pop these into the oven and bake for 30 minutes and check on them, they should have risen and expanded and look a bit golden brown on top. I let this batch go until 40 minutes but they shouldn’t need any longer than that.

When they look and feel done, take them out of the oven and lift out of pan with foil and place on cooling rack. These are best when they are warm so feel free to dig in right away, just be careful not to burn yourself. These are so delicious and sweet on their own I don’t think they need frosting or anything else, but if that sort of thing floats your boat, go for it!

IMG_5494

 IMG_5500

Give these a try the next time you want something warm, sweet and comforting for breakfast and make my great grandma proud! I may have filled my belly with 3 of these, but whose counting. I did that tabata run on Thursday so I was feeling just fine about my decision to eat these rolls, and besides, I was technically already on vacation and we all know those calories don’t count right? 🙂

Cheers everyone! Let me know if you try them out or have any fun additions! I think next time I am going to try nutella and chocolate chips.

workouts

Tabata Time

I don’t know about you, but personally I’m not a huge fan of this guy.

Reebok-T78_LE_Folding_Treadmill_2000x2000

I get bored, I get distracted and I stare at the time willing it to go by faster, seriously, I’ve only run .57 miles? Running on the treadmill is not my favorite and does not encompass what I love about running. When I run outside I feel free, running is a time for fresh air and mental clarity, I reach a sort of nirvana that seems to somehow balance everything else in my life. Finding such high on the treadmill has often been elusive.

I tend to be the opposite of most people when it comes to their reasons for running on the treadmill. Most people go inside when the weather gets bad, I happen to love the “bad” weather. If its cold, rainy, or just generally icky (which is pretty often -hello I live in Seattle) you can find me on out there running in a happy blissful cold bubble. Maybe it just makes me feel more badass to be out there when no one else will.

running-in-the-rain-hardcore

However, even I am human and when the rain is pouring down and I’m going to be exercising in the middle of my work day, getting my hair completely soaking wet before I return to work is slightly less than ideal and I have to turn to my nemesis, the treadmill. I’ve tried to make these interactions as useful as possible by choosing to use treadmill time for HIIT or Tabata runs, not only to make them go faster but to compliment my longer steady runs on other days. So important to mix up your workouts.

We all know by now the benefits of HIIT and Tabata workouts, they are fast and efficient, burn more fat, and get your metabolism up and keep it up for up to 48 hours after your workout. Who does’t want their body burning fat the day after your run when you end up with a spoonful of cookie dough in your hand? I know I do! Tabata workouts are supposed to push you as hard as you possibly can go for 20 seconds and then recover for 10 seconds until you complete 8 sets.

When you feel too busy or like you don’t have time to work out, turn to HIIT or Tabata and you won’t regret it. This tabata run is only 20 minutes and can be done on your lunch or just anytime you want a challenging and rewarding workout in a pinch.  I like to follow this up with some strength training, core work and stretching to feel well rounded. During your 10 seconds off, straddle the treadmill carefully and hop back on for the 20 second work sections. These speeds are just a guideline, use a speed to sprint that you can maintain but that is challenging, safety first folks, don’t want any stories of people flying off the back of any treadmills cursing my name 🙂

Busy Dame’s Tabata Run

tabata

Give it a try and let me know what you think, I’m heading out to do this on my lunch now. Don’t be afraid to push yourself, I know you will surprise yourself with how strong you’ll feel and you’ll be glowing afterward! Enjoy!

recipe

Gluten Free Brownies

IMG_5448

I’m a big fan of the lazy Sunday, though these days my lazy Sundays have taken on a new look the older I get. Often filled with cleaning and trips to the grocery store, they have become more of a prep for the week. Today mine started with a chilly 6.5 mile run through Discovery Park with a great friend, taking in the spectacular view and catching up with good news and nourishing my soul with exercise. After a quick shower and breakfast of, you guessed it, oatmeal, I decided my four legged friend could use some exercise too and drug him to Greenlake for a 3 mile walk. What did all of that earn me? I settled on brownies, and not just any brownies, but rich, chocolaty gluten free brownies.

Recently, my handsome man friend decided to venture into new gluten free territories and doing my best to be supportive (and since I do 99% of the cooking anyway 😉 I decided to go right along with him. It’s been a fun and new challenge moving away from old standbys of a lazy pasta dinner here or weekend pancakes there but more than worth it. It’s pushed me past my comfort zone and forced me to learn new things about baking and cooking that I didn’t know and am forever grateful to have explored. Often gluten free things can be even richer and denser without the flour to fluff things up and I for one, especially when it comes to brownies, like it dense.

While we’re currently past the gluten free period of our lives together (for now anyway) and while man friend is not actively avoiding gluten, I still try to limit its presence in our kitchen as we both tend to feel better without large amounts of it.  I’ve made a fair amount of gluten free cakes but wanted to see if I could get that to translate into a brownie, and I gotta say, not disappointed with the result. Try these out when you have an extra half hour or so and you’ll have something to enjoy on your lazy Sunday, whatever that entails.

Gluten Free Dark Chocolate Brownies

Prep Time: 15 minutes | Cook Time : 25 minutes | Serves : well… that all depends…

1 cup sugar

1 1/4 cup dark chocolate chips

1/2 cup coconut oil

1/2 cup cocoa powder

1/2 oat flour (you can make this yourself by just grinding oats in the blender)

4 eggs

1/2 tsp salt

2 tsp vanilla

IMG_5453            IMG_5450

1.Preheat oven to 350 degrees. Line 8X8 square pan with parchment paper and spray with non stick spray.

2. Melt the coconut oil and 1 cup of the chocolate chips, you can do this on the stove top or in the microwave. If you go the microwave route just make sure you do it in about 30 second intervals and stir in between.

IMG_5458

3. In the meantime, beat the eggs and sugar together in a stand mixer on low, you don’t want them to get frothy, just combined. When chocolate has melted, and cooled, add slowly to eggs and combine. You’ll want to do this slowly so the chocolate doesn’t cook the eggs.

IMG_5460

4. Once egg mixture and chocolate are combined, add cocoa powder, oat flour, salt and vanilla.

5. Pour mixture into prepared pan, top with remaining 1/4 cup chocolate chips. Bake for 25 minutes until knife inserted comes out clean. Let cool before cutting, if you can wait that long 🙂

IMG_5465            IMG_5468

*These could probably be done with almond flour or another gluten free flour but I personally like oats (duh) and oat flour is so easy to make and much cheaper than other specialty gluten free flours.

Hope you enjoy these as much as we do!

Uncategorized

Sleepin in on a Friday

oat21

I think I could eat oatmeal every day for the rest of my life. I like oatmeal so much, that there was a period in my life when I was being especially frugal and found myself eating oatmeal for lunch every day and miraculously, I’m still not burnt out on it. I’m pretty sure that a lot of people don’t share this sentiment or find oatmeal a bit on the bland side. Even I can’t eat the exact same oatmeal every day so I try to make it as exciting as I can.

I also should say that I really love sleep, and refuse to get up any earlier than I absolutely have to. I have my mornings down to about a 10-15 minute routine so that I can squeeze out every last minute of precious shut eye before I have to head out into the cold and catch the bus. Because of this, I just am not someone who eats breakfast at home, but do recognize its importance for overall health in my day as a whole so I’m always looking for quick, easy breakfast ideas.

Most often I make my oatmeal at work, I bring the ingredients to work and they sit on my desk all week as I work my way through them, but this week I just felt like something different. Enter overnight oats. If you haven’t done these before or are just looking for a different way to start your day with this heart healthy, fiber full, cholesterol lowering, blood sugar stabilizing gluten free wonder grain, you have got to try them! These oats are full of protein, omegas, and good fats to keep you going until lunch.

Overnight oats are a super easy breakfast and you can’t really go wrong with them, so you have no excuse not to start your day with something delicious and healthy. You put all the ingredients together in the evening and then walk out of your kitchen and don’t look back (except for that late night cookie dough munching). This recipe was about two days worth, but when its this easy, I promise you can do this a couple times a week, or feel free to double to get you through the whole week.

Vanilla Cinnamon Overnight Oats

Servings 2 | Prep time : 5 minutes | Total Time : 8 hours

1 cup organic oats (this time I used Trader Joe’s Organic Multigrain Hot Cereal – Regular oats will work just fine, just make sure they aren’t steel cut)

1/2 cup 2% plain greek yogurt

3/4 cup vanilla unsweetened almond milk

1 tbsp chia seeds

1 heaping tbsp ground flax

1 tsp cinnamon

1/2 tsp vanilla extract

Optional Toppings

Banana

Berries

Nut butter

Coconut flakes

1. Put all ingredients into mason jar, shake and put into fridge overnight. Any container will do, I’m just loving these blue mason jars and use them for everything including my morning smoothies, oatmeal and salads.

mason

2. In the morning, pull your fabulous self out of bed, grab oats on your way out the door or enjoy at home. I topped mine this week with some frozen berries but I think almond butter or any other fruit would really go well with these, they are a yummy palate for just about anything!

oat1

*Easily made vegan if you remove the greek yogurt. This can be replaced with a non-dairy yogurt or more almond milk.

*Should also note I ate these cold but they can easily be warmed if you’re wanting something a bit more comforting or live somewhere especially cold and the thought of eating some cold oatmeal is just downright ludicrous.

Hope you guys enjoy! Happy Friday!

Uncategorized

Let’s Get Started!

So, I love cooking, like, really love it. There’s something therapeutic about coming home with a big bag of fresh produce and goodies, walking into my kitchen after a long day and creating something delicious. It is the best transition from work to home life, and helps me move easily into an innovative space.

This past weekend was the exception, my handsome man was out of town.  I wholeheartedly believe that there is enormous value in going through the work of preparing a beautiful and yummy meal for yourself because you deserve it! But – sometimes, I just plain don’t feel like it. Also, sometimes a girl needs to channel her inner Olivia Pope and have herself a big ‘ol bowl of popcorn and a glass of red wine for dinner. 😉

So, after a long holiday weekend of too much take out and Valentine’s candy (salted caramels anyone? he returned just in time) I had someone else to cook for again.  I was ready to get my creative cooking juices flowing. It has been sunny and unseasonably warm here in Seattle for this time of year but I was feeling sympathy pains for those on the East Coast and was in the mood for something warm, comforting and after a long day, easy. That is exactly what THIS risotto is; simple, easy, delicious and filling. If you haven’t made risotto before, don’t be intimidated, it really is incredibly easy and hard to mess up.  It just takes a while, so be patient. I was feeling the need for greens so also included a kale salad, recipe below.


Sage Brown Butter Butternut Squash and Spinach Risotto

Serves 4 or one hungry dame and her partner

1 cup arborio rice

1/2 cup white wine

3.5 cups vegetable broth (chicken broth also works here if you aren’t veg)

1/2 a yellow onion

1 large scallion

4 tbps butter, divided

1 large butternut squash cubed, or 2 cups cubed

2 cups spinach

Olive Oil

Avocado oil

Salt & Pepper

Sage for garnish

Parmesan cheese (optional)

  1. Preheat oven to 425. Start with roasting your butternut squash, if working with a whole squash, slice in half, scoop out insides and peel, cubing into even bite size pieces. Most stores will sell this already chopped if you want to make your life easier. Toss cubes with avocado oil, salt and pepper. Roast 20-30 minutes checking often and stirring until sides are browned and squash is soft but not mushy, I personally prefer to taste test everything, feel free to pull a cube out and after cooling give it a taste. You want the squash to hold up once added to the risotto.
  2. Pour broth into a pot and warm on low heat.
  3. When squash is ready, pull out of oven and set aside.
  4. Next, finely chop scallion and onion. Add to large saucepan over medium heat with a drizzle of olive oil and 2 tbps of butter. Saute for about 5 minutes until the onion has softened.
  5. Add rice to saucepan and saute for about 2 minutes until rice is coated and a bit toasted. Add white wine and cook until white wine is mostly absorbed, don’t worry a lot of this will burn off and just leave a hint of flavor.
  6. Add about 1/2 cup of broth, stirring until all liquid is absorbed. Continue this with remaining broth, adding about 1/2 cup at a time, stirring often until risotto is soft but slightly al dente. Highly recommend the tried and true taste test here 🙂
  7. While risotto is cooking, add remaining 2 tbps butter and 4 sage leaves to a small saucepan and cook on medium heat. This will be your brown butter, so you will want to melt the butter quickly and continuously stir until butter begins to take on a golden brown color and a slightly nutty aroma, this will happen fast so don’t walk away, it can burn very quickly. Look for brown specks on the bottom of the pan and as soon as you see it turning brown, immediately remove from heat. Pull out the sage leaves carefully and set aside.
  8. When risotto is almost done, add spinach leaves on top and gently stir in until wilted. Add brown butter and cooked butternut squash and stir to combine. Add salt and pepper to taste.
  9. Serve immediately with caramelized sage leaves and Parmesan cheese if desired and enjoy!

Here is what ours looked like, I’ll get better going forward at photos throughout the process and up my photo game.

risotto

*I use avocado oil in this recipe for roasting because it’s safe up to 500 degrees. Olive oil has been known to release carcinogens when heated above 350 degrees. Not a huge deal, just a personal preference, avocado oil has no real flavor and you really can’t tell the difference with the finished product, I use it for all my roasting or high temperature needs. I use Chosen Foods, you can get it here or Costco :  http://www.amazon.com/Chosen-Foods-Avocado-Bottle-Naturally-Refined/dp/B00CYMF1CO

*This can easily be made completely vegan by omitting the cheese and butter completely. You can saute the onion and scallion in olive oil and just skip the brown butter. I think it adds a lot in the way of flavor but I have also done without and it will still be very delicious sans dairy.

*Risotto keeps very well and is great reheated for leftovers if for some crazy reason you don’t eat it all in one sitting.


Kale and Brussel Sprout Salad with Lemon Mustard Vinaigrette 

Serves 4

Salad

2 cups baby kale

1 cup raw shredded brussel sprouts

3 cooked beets, sliced

1/2 cup garbanzo beans

1/4 cup sliced almonds

1/4 cup shaved pecorino

Dressing

1 lemon

2 tbps dijon mustard

Olive oil

Salt and Pepper

I’m a huge fan of making my own dressing, after looking at the labels on store bought dressings there is just too much added sugar and chemicals for my taste and throwing together a homemade dressing takes minutes, can often be done with whats already in your kitchen and gives you lots of freedom.

  1. To make dressing, add juice of one lemon and mustard to a small mason jar. Add salt and pepper to taste and shake to combine. Allow to sit a few minutes and then add olive oil to taste. I like this especially mustardy so there’s no right amount of oil, just start adding and play around with this to get it to a flavor/consistency that works for you, just make sure you’re using a good olive oil.
  2. To assemble salad, add washed and dried kale and brussel sprouts to bowl. Add beets, garbanzo beans and almonds.
  3. Toss salad with dressing and add cheese on top.
  4. Serve immediately and enjoy!

salad

*Again, this easily becomes a vegan salad if you omit the pecorino, and no one would ever know, this salad is filling and balanced all on it’s own if you choose to leave the cheese out.

Hope you all enjoy these as much as I do, I think they compliment each other very well and were a hit in our house. Even our hairy baby was sniffing around for handouts. Cheers!